本文介绍了在Windows系统本地部署OpenClaw的完整流程。首先安装Nodejs、Git和Visual Studio,然后通过npm安装OpenClaw并进行交互式配置。部署完成后,通过PowerShell脚本将OpenClaw注册为Windows服务,实现开机自启动,解决了需手动启动的问题。
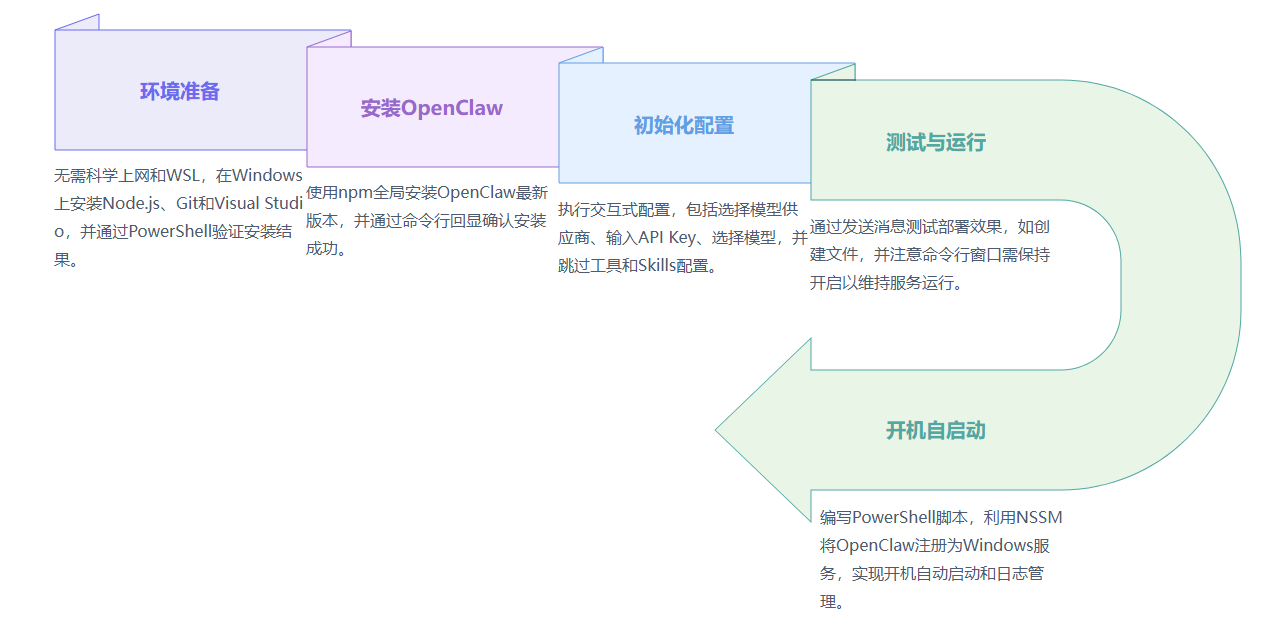
一、部署环境说明
· 无需科学上网
· 本地部署,无需WSL
二、安装步骤
1、安装 Node.js、Git 和 Visual Studio
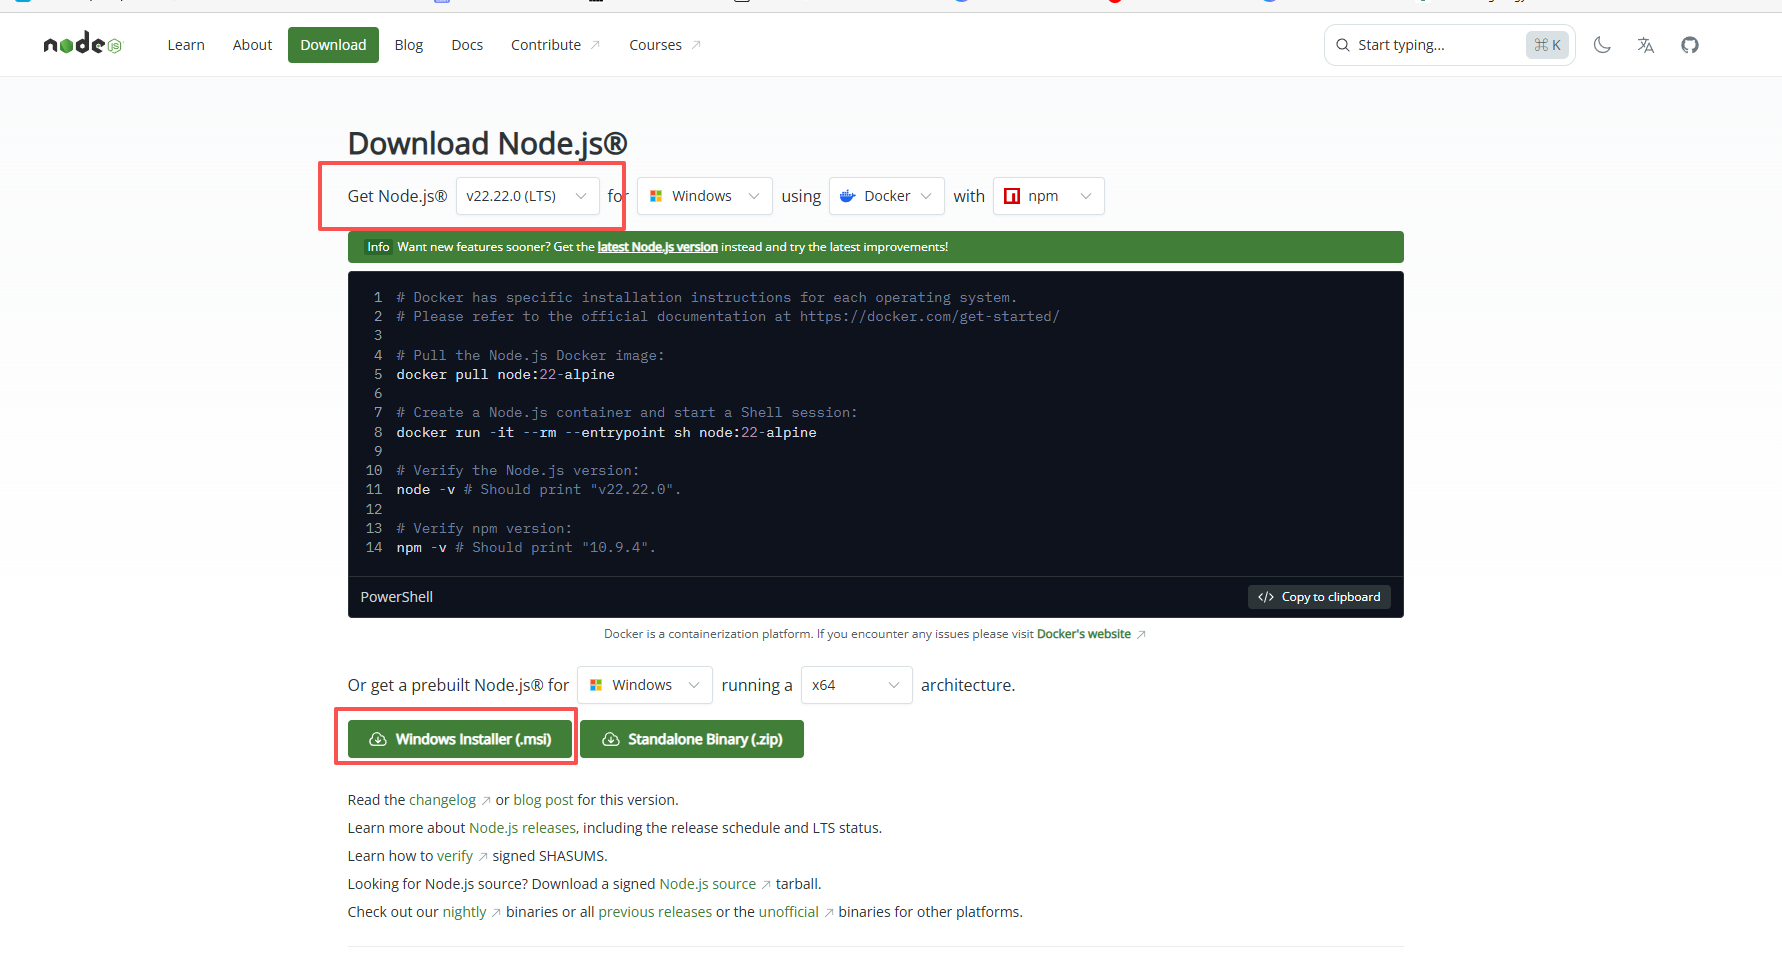
1)下载安装包
· Node.js + Git + Visual Studio 点击下载
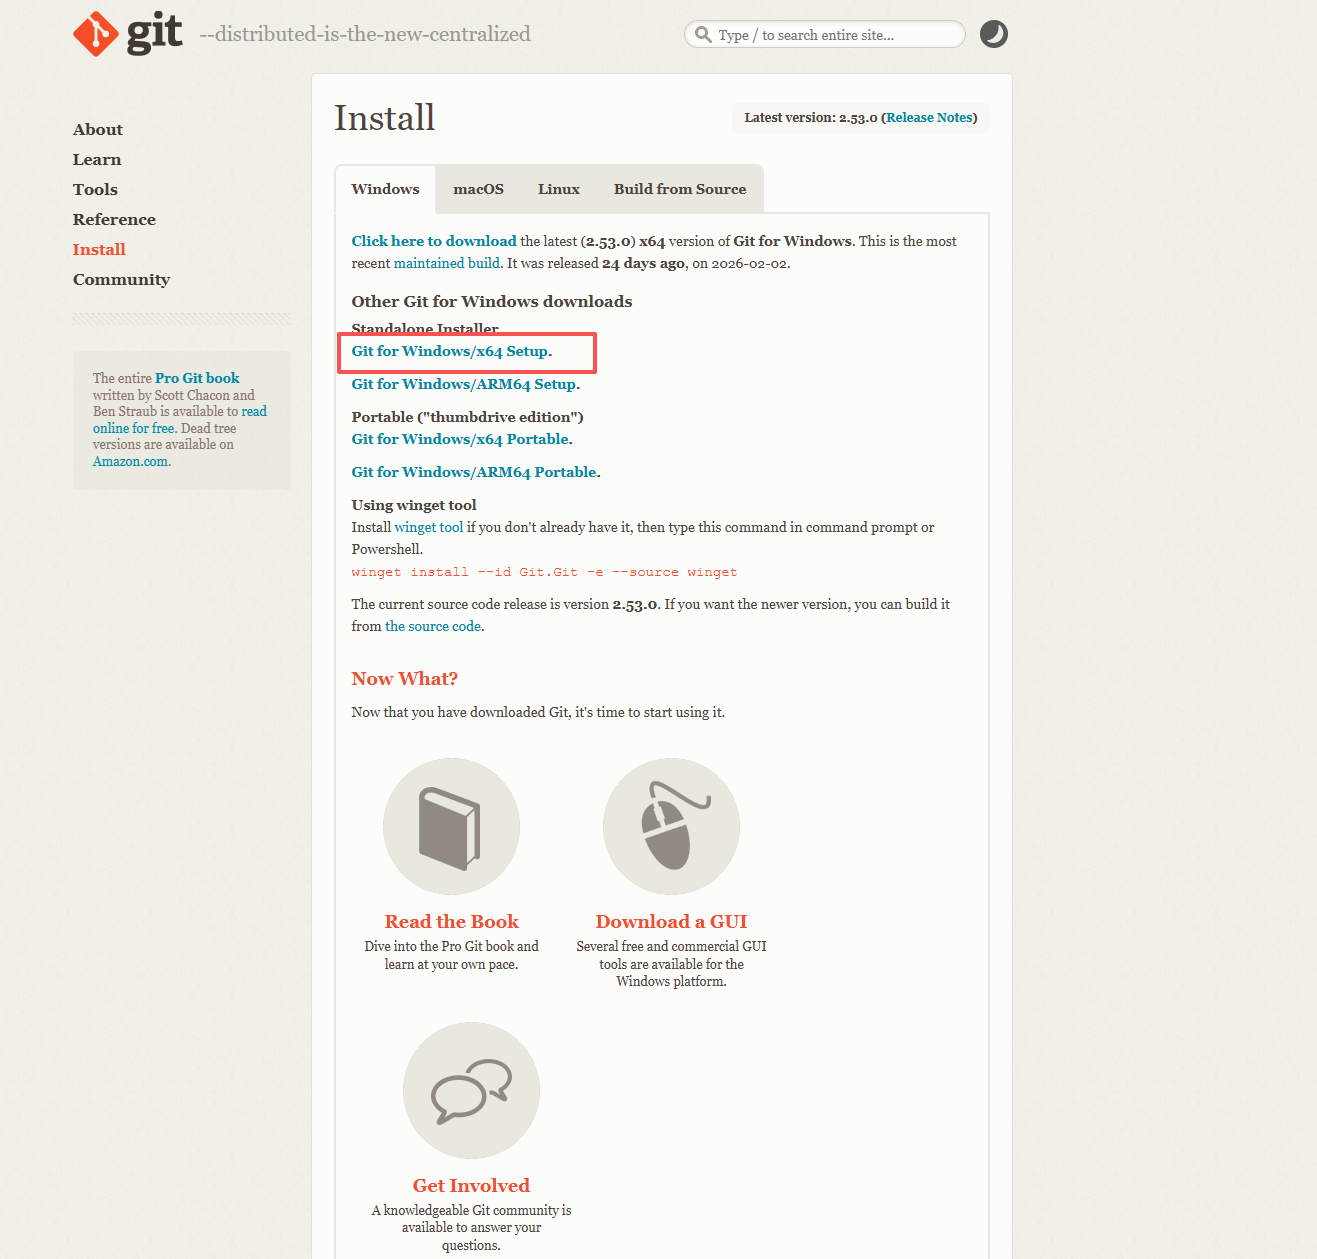
2)安装Git
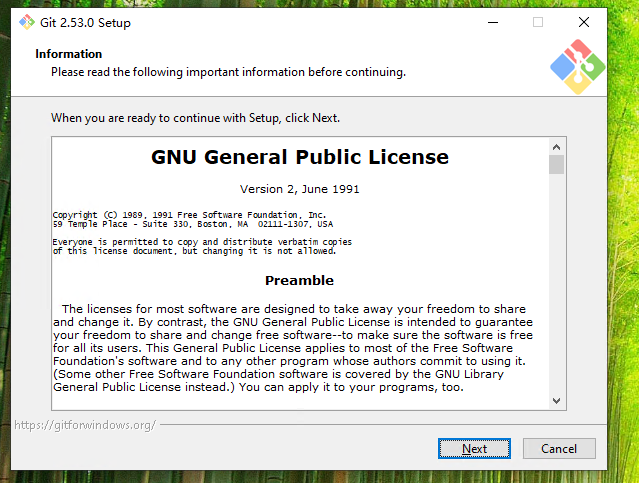
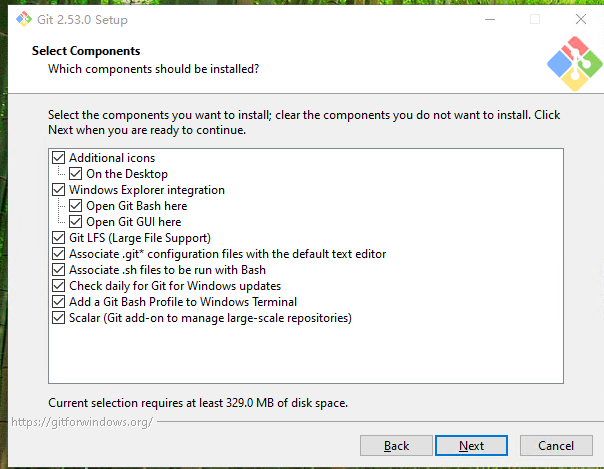
· 安装过程中请全部勾选选项,持续点击“下一步”直至完成
· 在相关步骤选择“Use Windows' default console window”,继续下一步
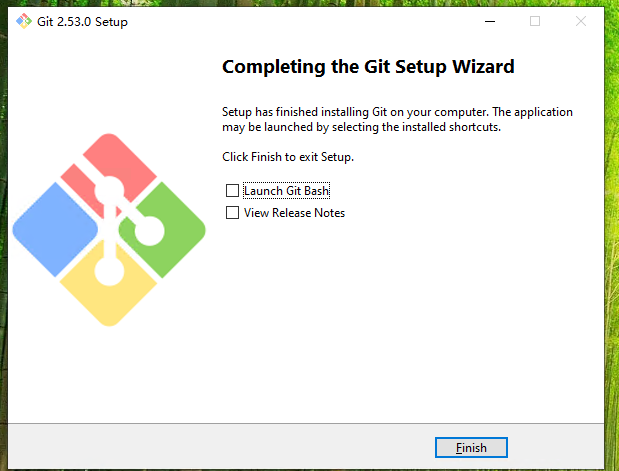
· 安装结束时,无需勾选任何选项,点击“Finish”完成
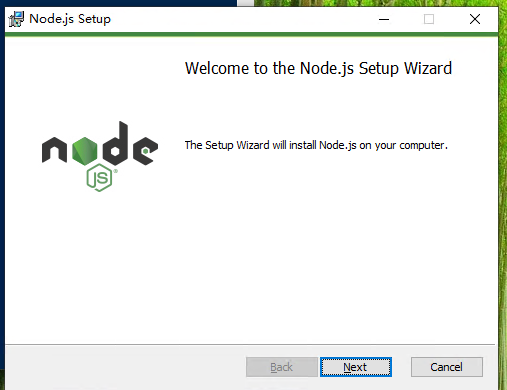
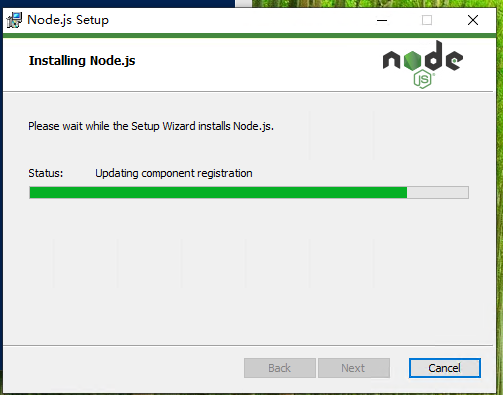
3)安装 Node.js
· 按照提示,持续点击“下一步”即可完成安装

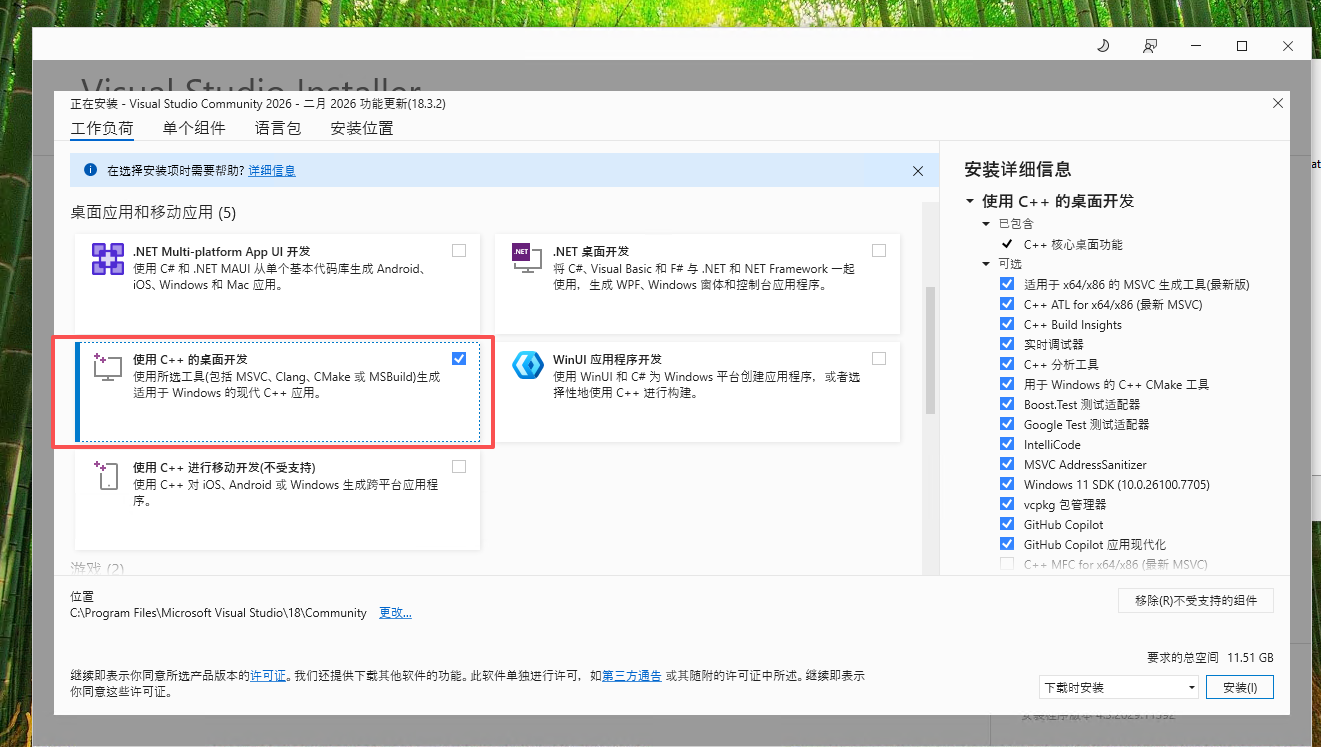
4)安装Visual Studio

· 在安装界面勾选“使用C++的桌面开发”选项
5)验证安装结果
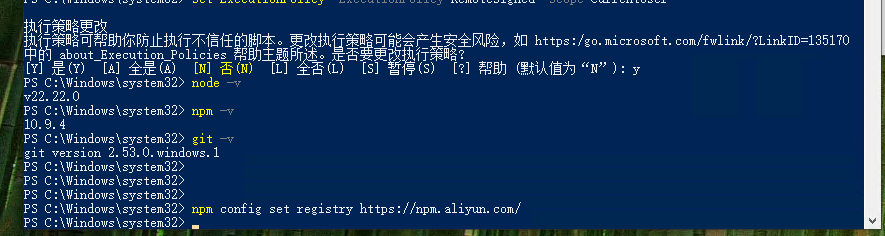
· 以管理员身份打开 PowerShell
· 右键点击Windows图标,选择“Windows PowerShell(管理员)”

· 依次运行以下命令,检查安装结果:
Set-ExecutionPolicy -ExecutionPolicy RemoteSigned -Scope CurrentUser
node -V
npm -V
git -V
2、下载 OpenClaw
· 在刚刚打开的 PowerShell窗口,执行如下命令:
npm install -g openclaw@latest
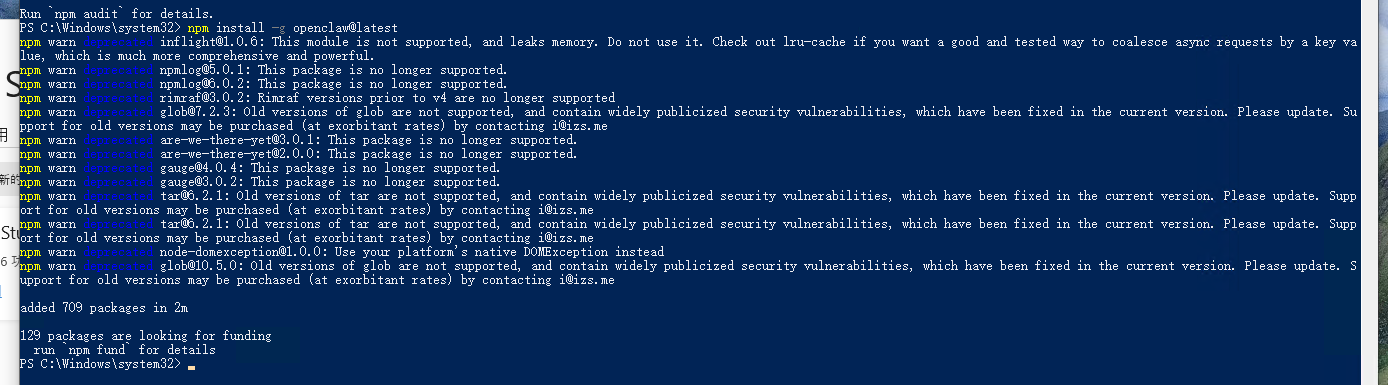
· 若出现安装回显,说明已成功安装
3、初始化配置OpenClaw
1)在命令行窗口执行:
openclaw onboard
2)进行交互式配置
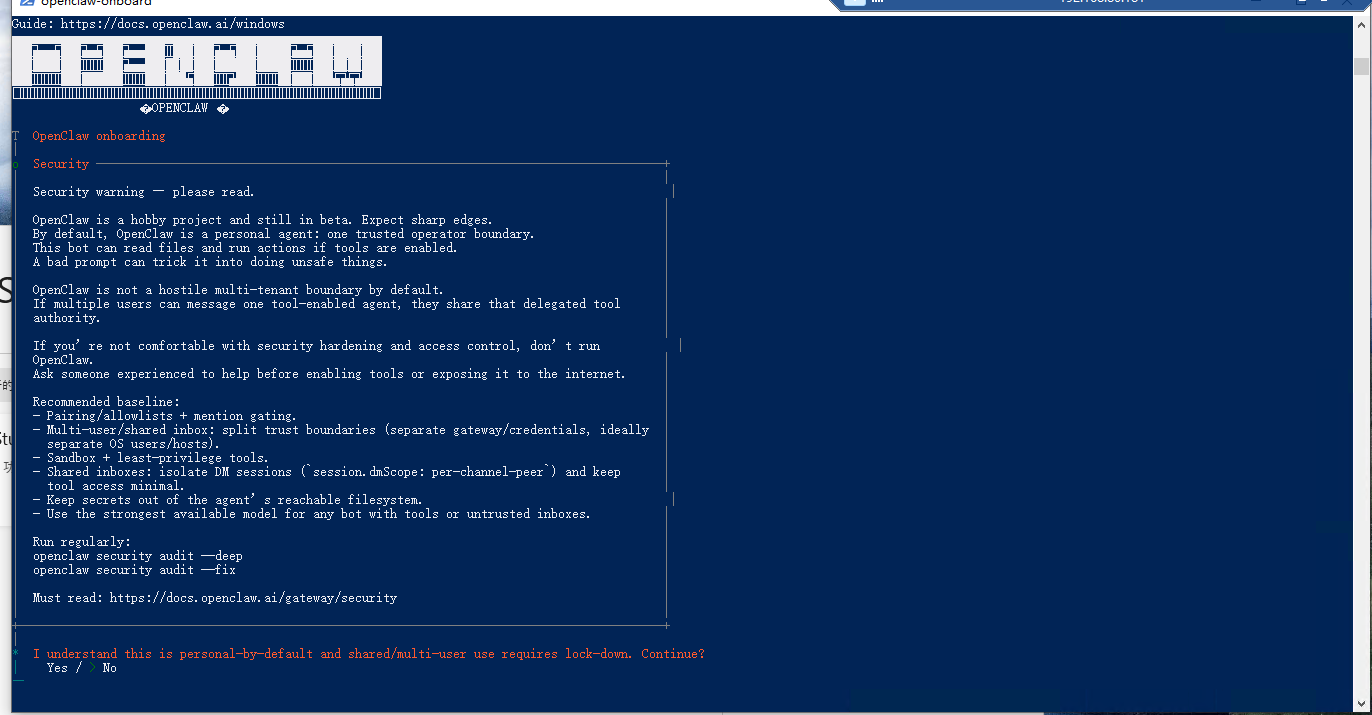
· 部署存在风险时,选择“yes”并回车

· 选择“QuickStart”并回车
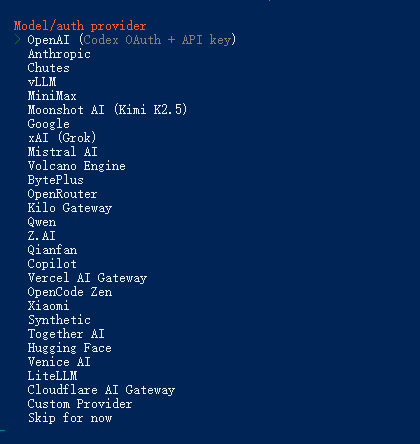
· 选择模型供应商(如火山引擎),回车确认

· 输入火山引|擎的APIKey,粘贴后回车即可
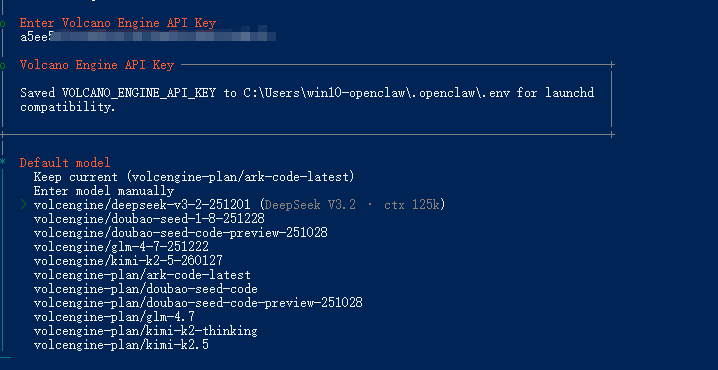
· 选择模型(如volcengine-plan/ark-code-latest),可根据实际需求更改
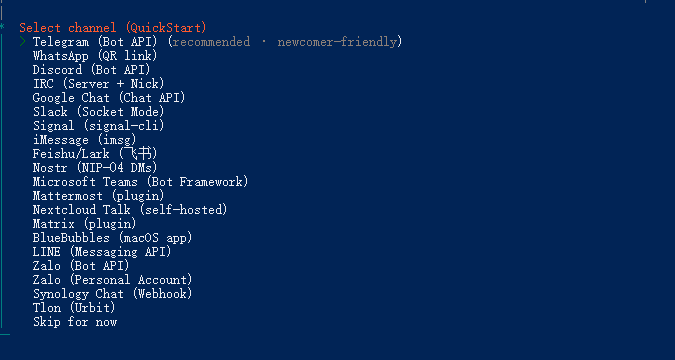
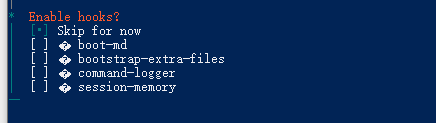
· 对话工具配置暂时跳过,选择“skip for now”
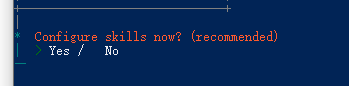
· Skills 配置暂时跳过,选择“no”

· 日志和会话记录建议全部选上,通过方向键加空格选中,回车确认

· 等待OpenClaw的Gateway程序自动安装并打开浏览器网页
三、测试与设置开机自启动
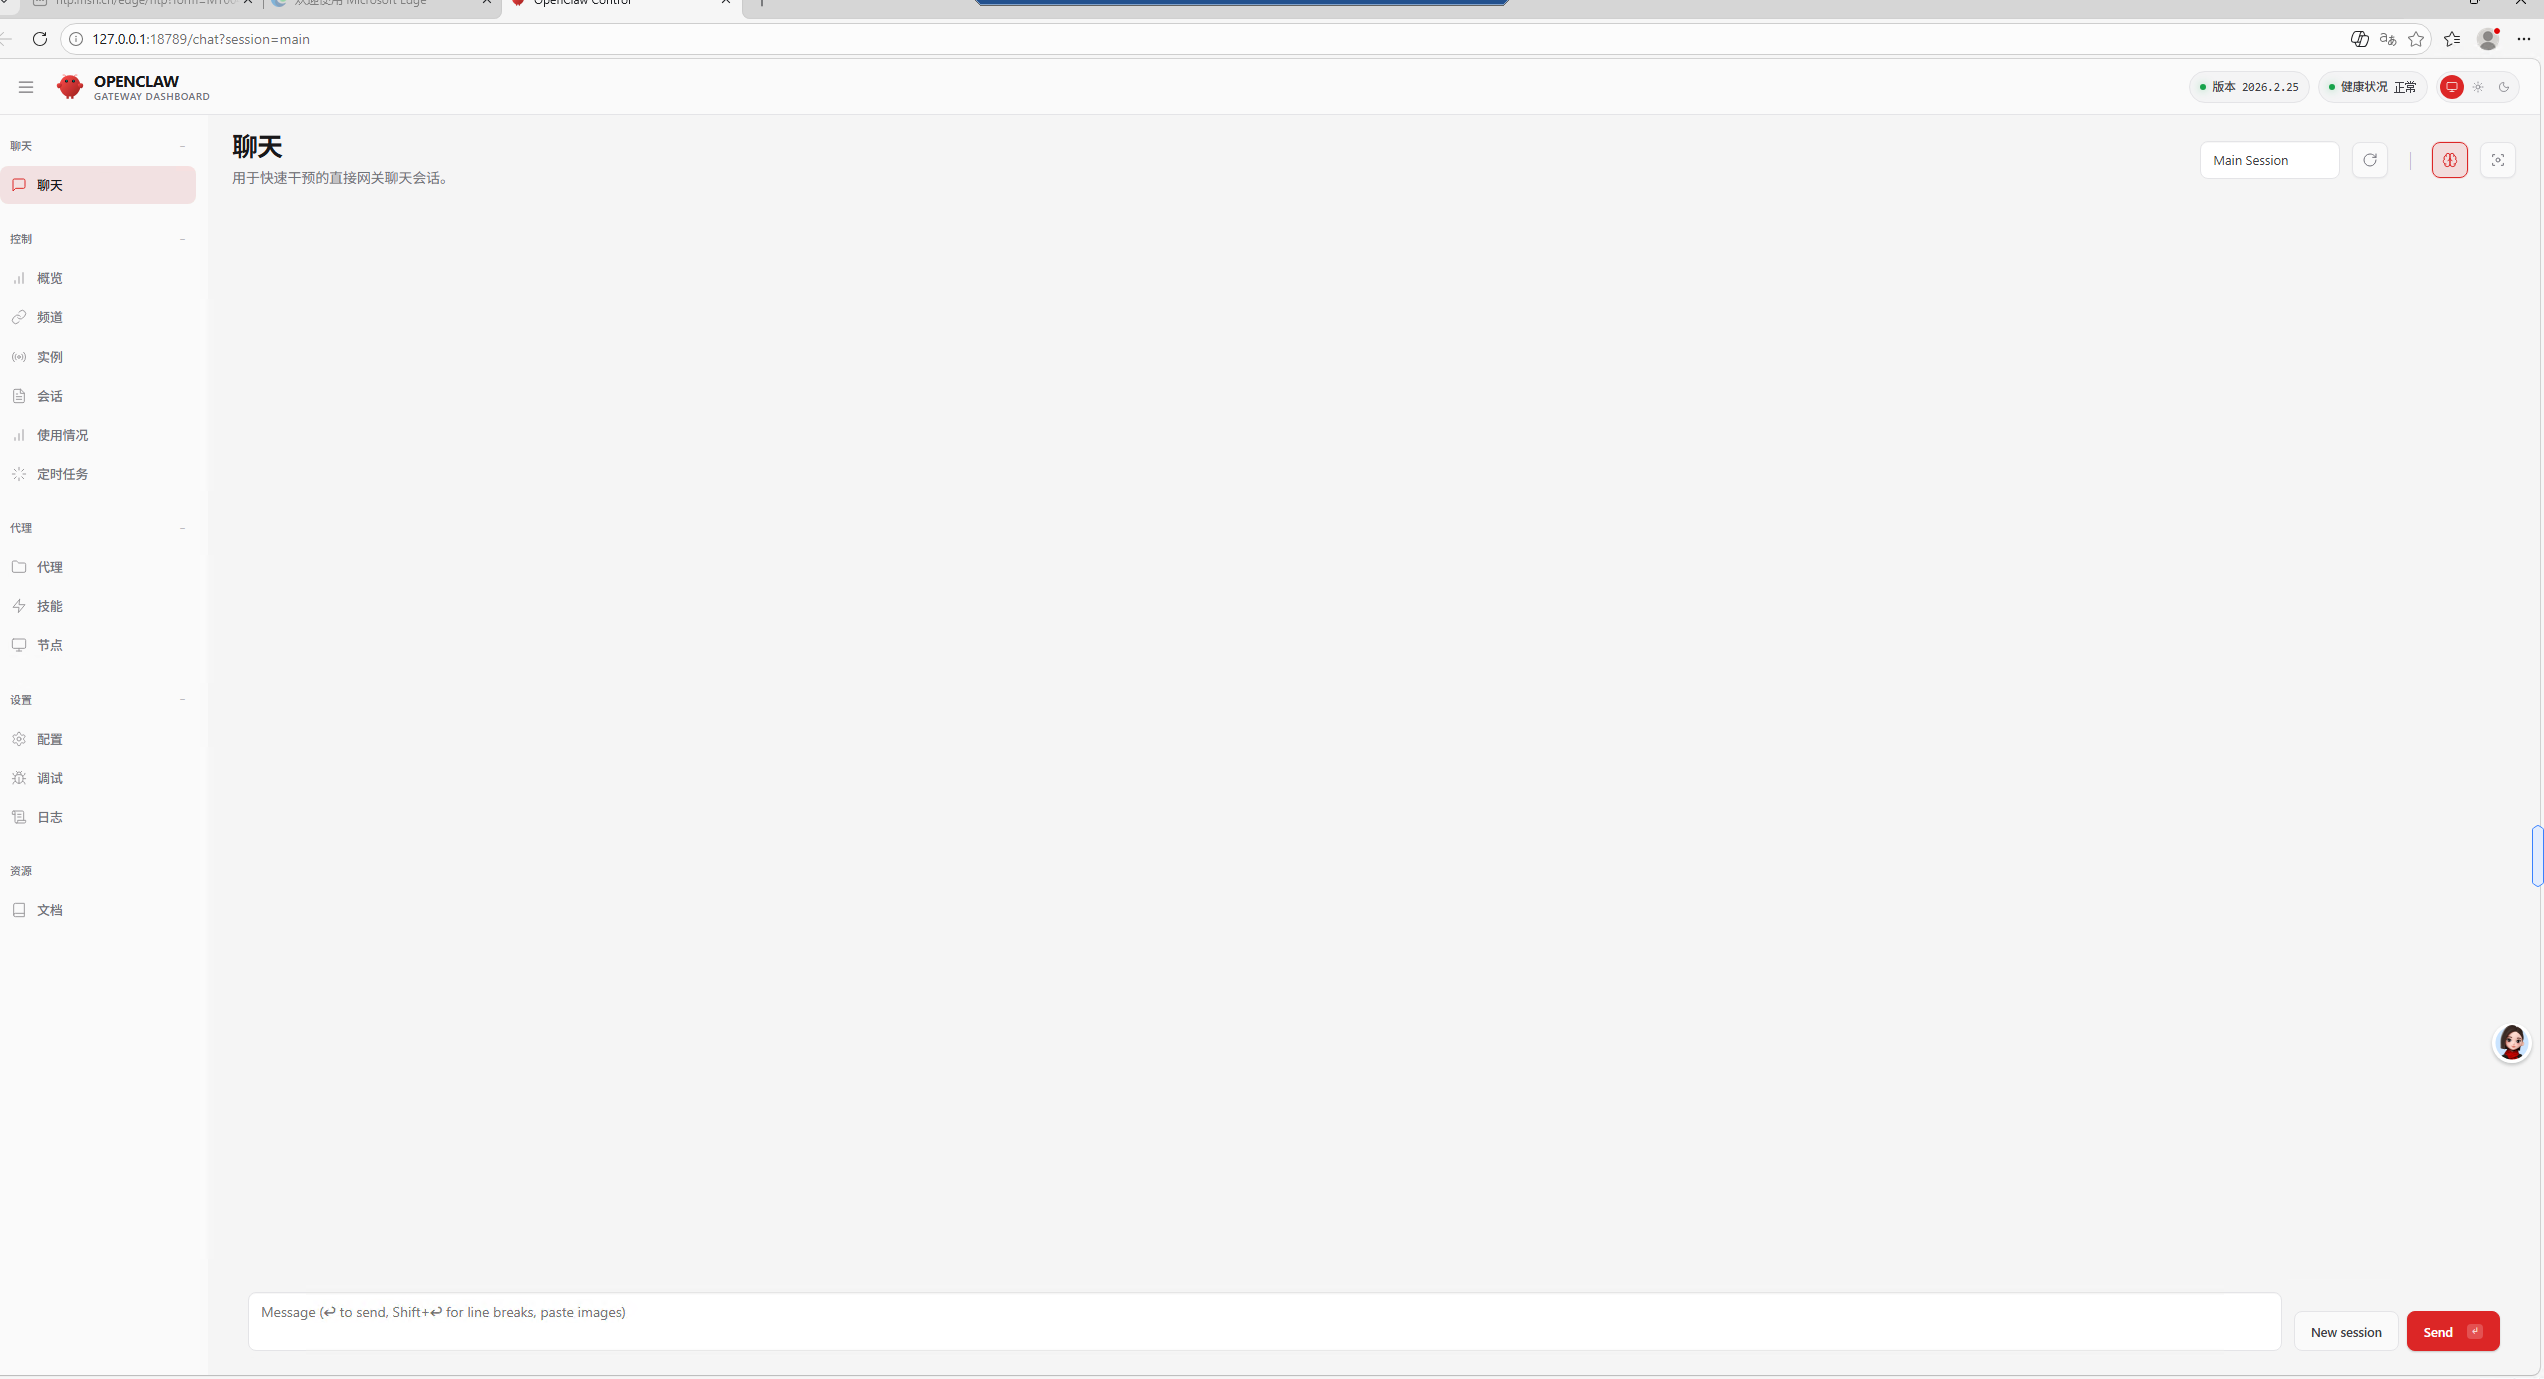
· 安装完成后,可发送消息测试部署效果。示例:在桌面创建“hi.txt”文件,并返回存放路径
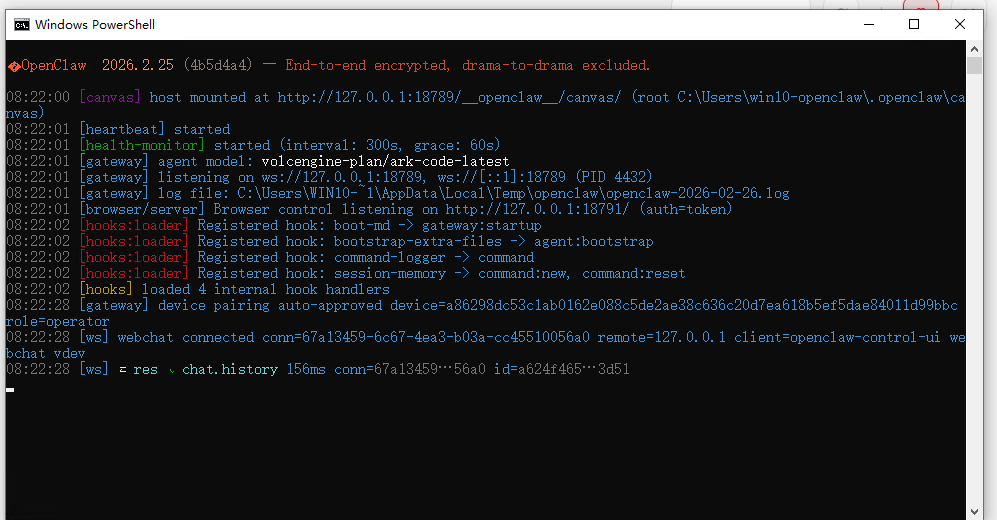
注意:命令行窗口不可关闭,关闭后OpenClaw会停止运行。
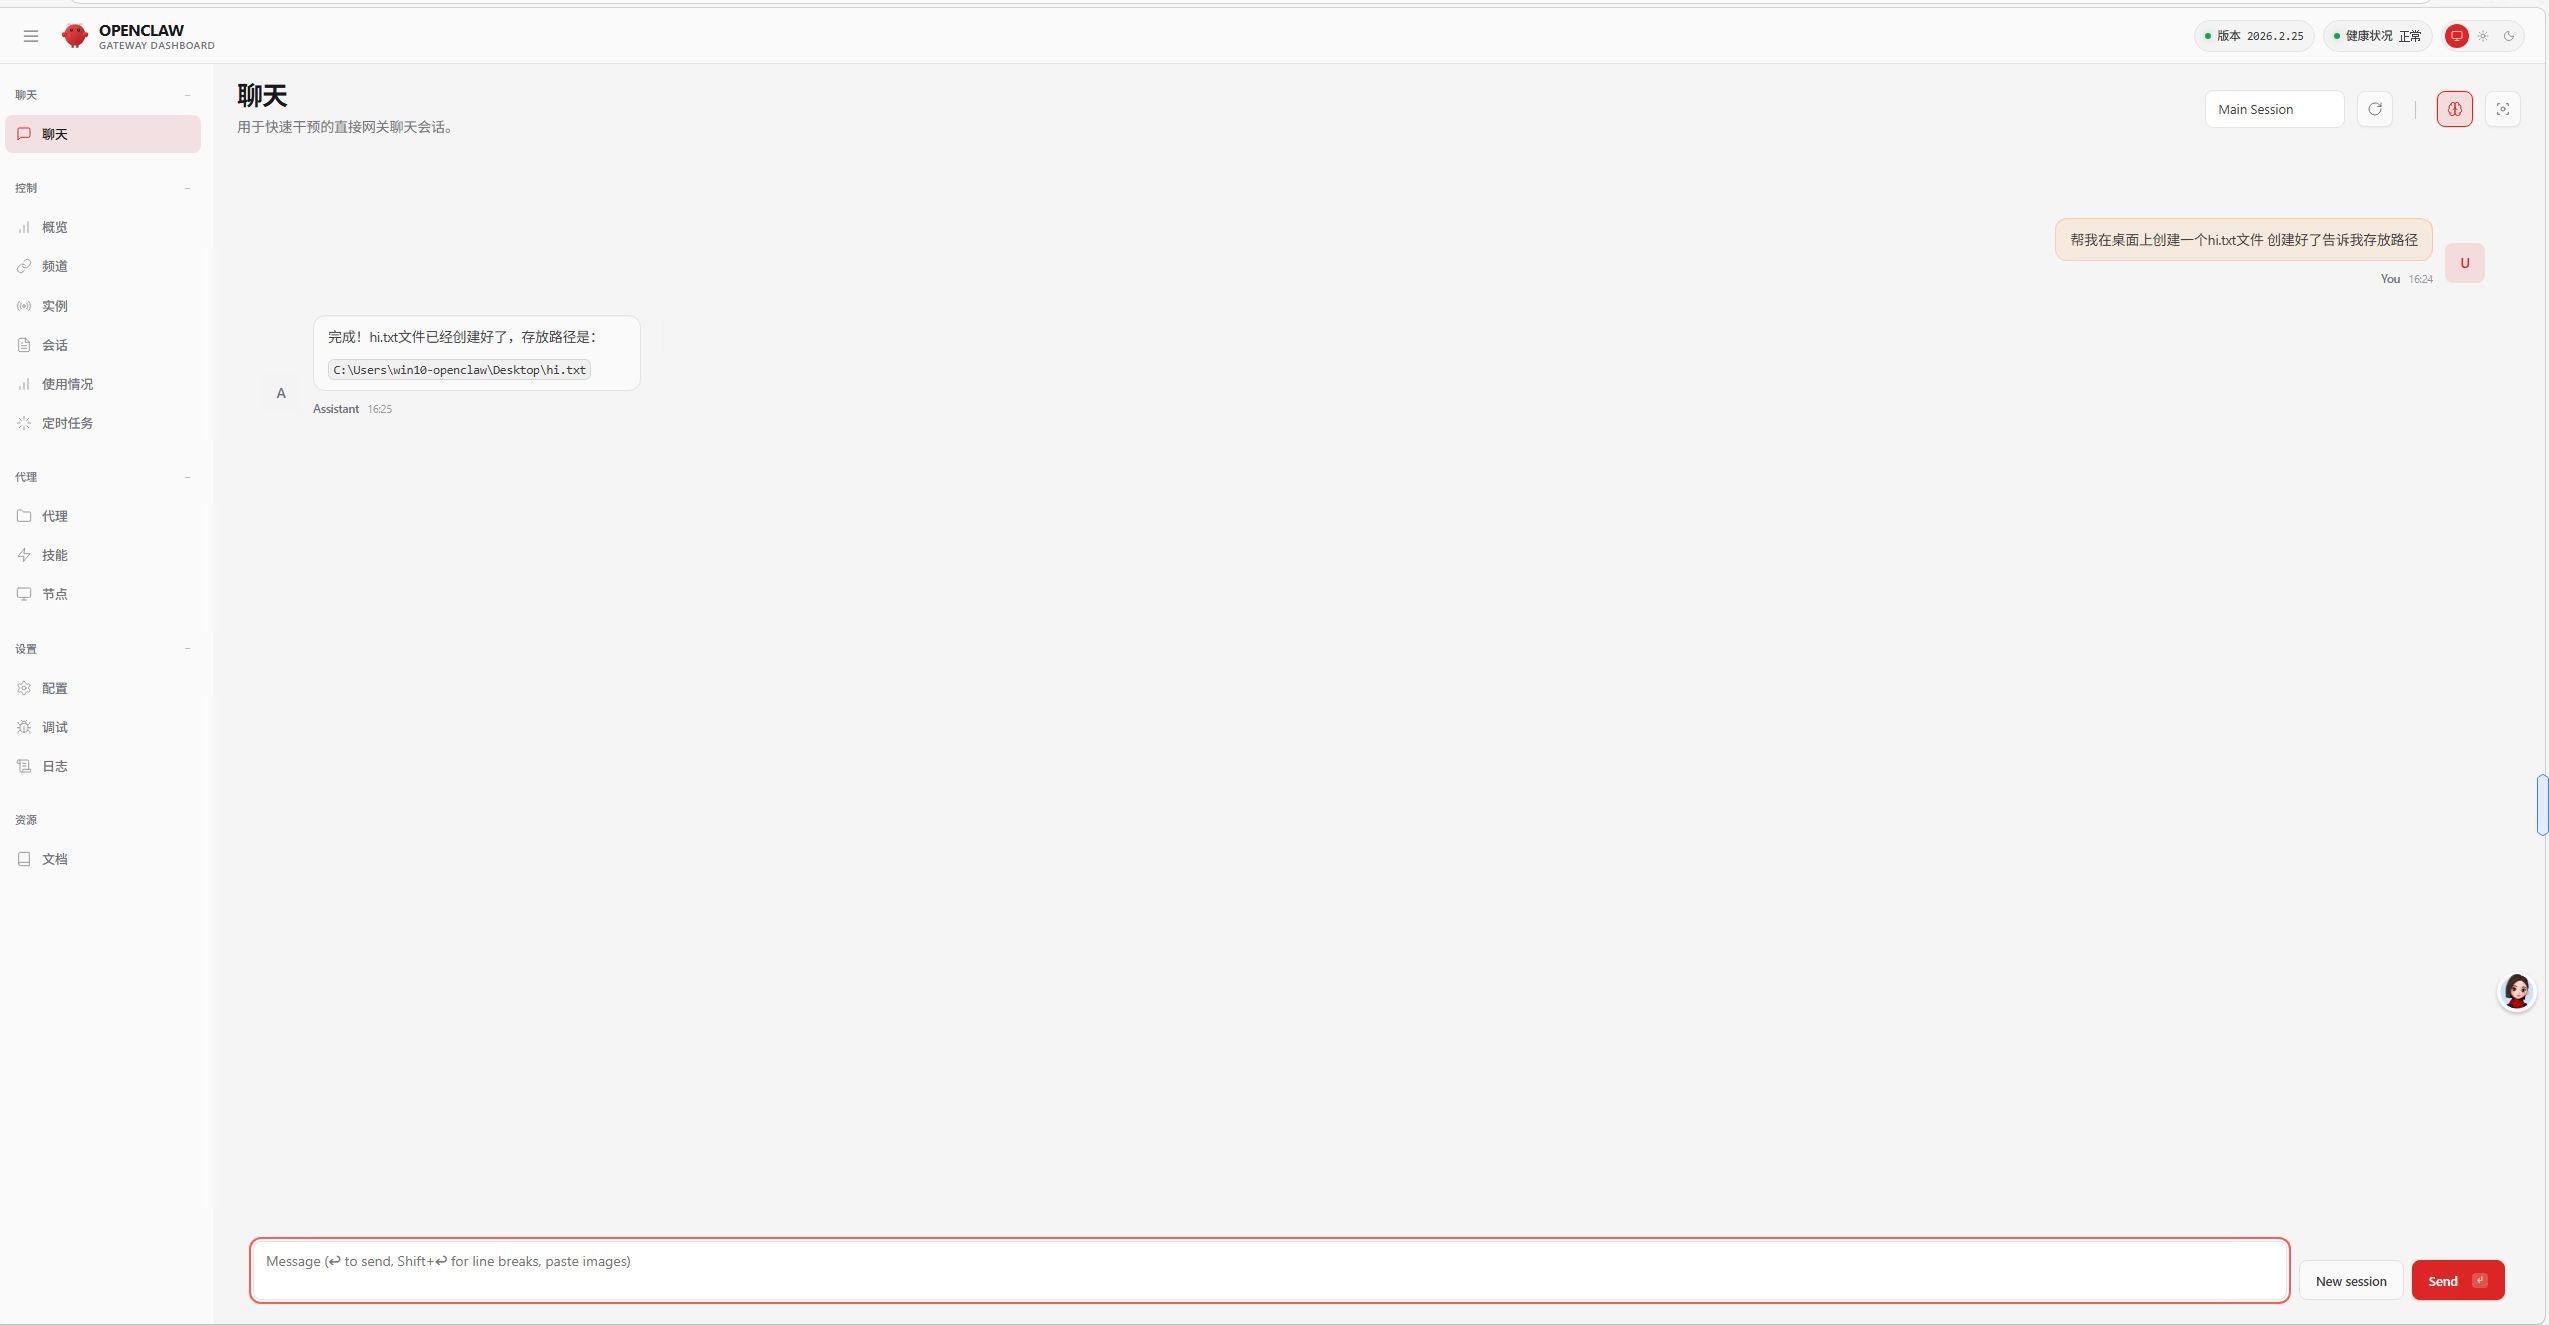
· Al执行完毕后,可检查成果
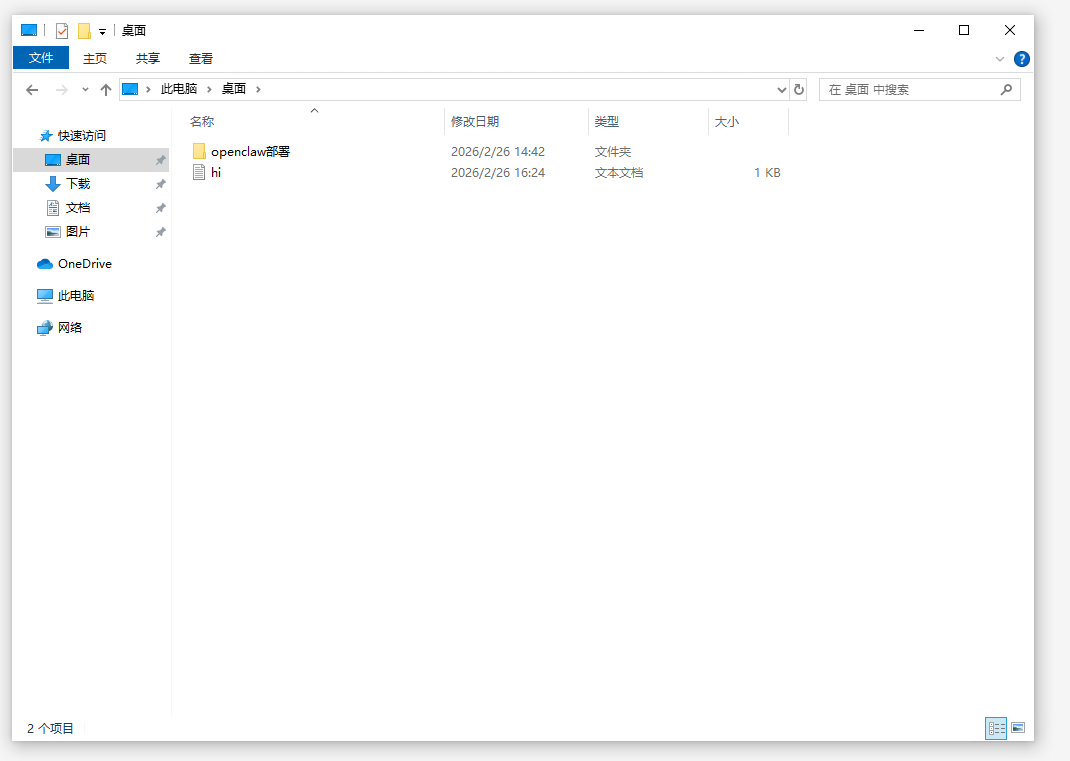
· 文件已成功创建,部署完成
· 部署缺点:每次重启需手动打开 PowerShell 并输入openclaw gateway run命令,否则无法访问控制台网页
· 为解决此问题,已编写脚本实现开机自启动

开机自启动操作步骤
设置前需要先关闭openclaw运行窗口
1、创建一个txt文件
2、将以下代码复制到txt文件中:
# 1. 自动提权
if (!([Security.Principal.WindowsPrincipal][Security.Principal.WindowsIdentity]::GetCurrent()).IsInRole([Security.Principal.WindowsBuiltInRole] "Administrator")) {
Start-Process powershell.exe "-NoProfile -ExecutionPolicy Bypass -File `"$PSCommandPath`"" -Verb RunAs
exit
}
Write-Host "🔧 正在将 OpenClaw 注册为 Windows 服务..." -ForegroundColor Cyan
# ================= 配置区域 =================
$serviceName = "OpenClawGateway"
$serviceDesc = "OpenClaw Gateway Service - Runs automatically at boot"
$nssmUrl = "https://nssm.cc/release/nssm-2.24.zip"
$nssmZip = "$env:TEMP\nssm.zip"
$nssmDir = "$env:TEMP\nssm"
$nssmExe = "$nssmDir\nssm-2.24\win64\nssm.exe" # 假设 64 位系统
# 获取当前用户真实路径
$realUser = $env:USERNAME
$userProfilePath = "C:\Users\$realUser"
$nodeExe = "C:\Program Files\nodejs\node.exe"
$scriptPath = "$userProfilePath\AppData\Roaming\npm\node_modules\openclaw\dist\index.js"
$logDir = "C:\OpenClaw\Logs"
# 验证核心文件
if (-not (Test-Path $nodeExe)) { Write-Host "❌ Node.js 未找到"; exit 1 }
if (-not (Test-Path $scriptPath)) { Write-Host "❌ OpenClaw 脚本未找到"; exit 1 }
# 创建日志目录
if (-not (Test-Path $logDir)) { New-Item -ItemType Directory -Path $logDir -Force | Out-Null }
# ================= 1. 下载并准备 NSSM =================
if (-not (Test-Path $nssmExe)) {
Write-Host "📥 正在下载 NSSM..." -ForegroundColor Gray
try {
Invoke-WebRequest -Uri $nssmUrl -OutFile $nssmZip -UseBasicParsing
Expand-Archive -Path $nssmZip -DestinationPath $nssmDir -Force
Write-Host "✅ NSSM 下载完成" -ForegroundColor Green
} catch {
Write-Host "❌ 下载 NSSM 失败,请检查网络或手动下载放在 $nssmDir" -ForegroundColor Red
exit 1
}
} else {
Write-Host "✅ NSSM 已存在" -ForegroundColor Green
}
# ================= 2. 移除旧服务 (如果有) =================
& $nssmExe remove $serviceName confirm | Out-Null
Start-Sleep -Seconds 1
# ================= 3. 安装新服务 =================
Write-Host "🛠 正在安装服务 $serviceName ..." -ForegroundColor Cyan
# 基础安装:应用程序路径
& $nssmExe install $serviceName $nodeExe "`"$scriptPath`" gateway --port 18789"
# 设置工作目录 (关键:让 openclaw 能找到相对路径配置)
& $nssmExe set $serviceName AppDirectory "$userProfilePath"
# 设置环境变量 (关键:欺骗 openclaw 认为它是当前用户运行的)
# NSSM 支持设置自定义环境变量
& $nssmExe set $serviceName AppEnvironmentExtra "USERPROFILE=$userProfilePath`0HOMEDRIVE=C:`0HOMEPATH=\Users\$realUser`0OPENCLAW_GATEWAY_PORT=18789"
# 设置日志输出 (可选,方便调试)
& $nssmExe set $serviceName AppStdout "$logDir\openclaw-out.log"
& $nssmExe set $serviceName AppStderr "$logDir\openclaw-err.log"
& $nssmExe set $serviceName AppRotateFiles 1
& $nssmExe set $serviceName AppRotateOnline 1
# 设置描述
& $nssmExe set $serviceName Description $serviceDesc
# ================= 4. 配置自动重启策略 =================
# 如果服务停止,等待 1 秒后重启
& $nssmExe set $serviceName AppExit Default Restart
& $nssmExe set $serviceName AppRestartDelay 1000
# ================= 5. 启动服务 =================
Write-Host "🚀 正在启动服务..." -ForegroundColor Cyan
Start-Service -Name $serviceName
# 等待几秒让服务初始化
Start-Sleep -Seconds 5
# ================= 6. 验证状态 =================
Write-Host "`n🔍 检查结果:" -ForegroundColor Cyan
$svcStatus = Get-Service -Name $serviceName -ErrorAction SilentlyContinue
if ($svcStatus) {
Write-Host "✅ 服务状态:$($svcStatus.Status)" -ForegroundColor Green
if ($svcStatus.Status -eq 'Running') {
Write-Host "🎉 服务运行正常!" -ForegroundColor Green
# 尝试调用 openclaw 状态检查
Write-Host "`n📊 OpenClaw 内部状态:" -ForegroundColor Cyan
& openclaw gateway status
} else {
Write-Host "⚠️ 服务已安装但未运行,请查看事件查看器或日志。" -ForegroundColor Yellow
Write-Host "📄 错误日志:$logDir\openclaw-err.log"
if (Test-Path "$logDir\openclaw-err.log") {
Get-Content "$logDir\openclaw-err.log" -Tail 10
}
}
} else {
Write-Host "❌ 服务安装失败。" -ForegroundColor Red
}
Write-Host "`n💡 管理命令:" -ForegroundColor Gray
Write-Host " 停止:Stop-Service -Name '$serviceName'"
Write-Host " 启动:Start-Service -Name '$serviceName'"
Write-Host " 卸载:& '$nssmExe' remove '$serviceName' confirm"
Read-Host "按回车退出"
· 保存txt文件后,将后缀名由 .txt修改为 .ps1
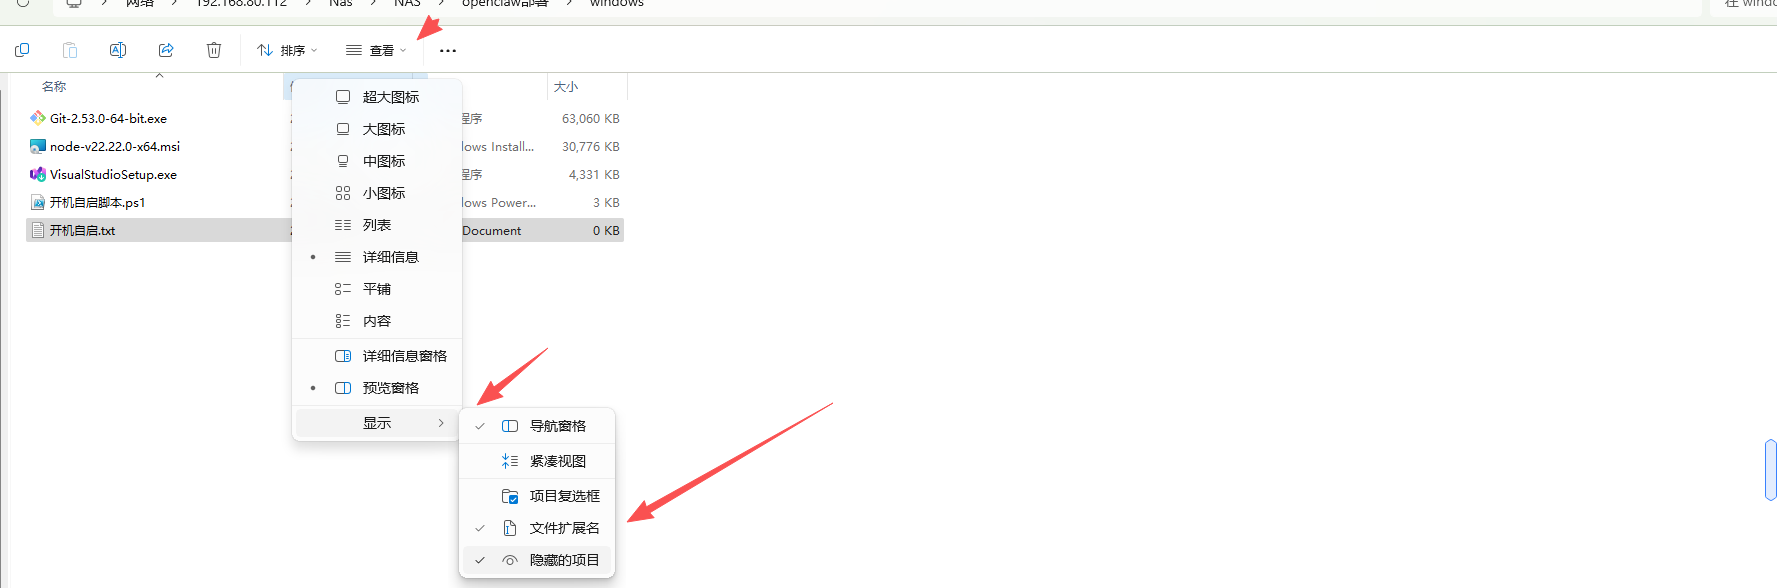
· 若看不到后缀名,可开启“文件扩展名显示”

· 右键文件,选择“使用PowerShell运行”,执行完成后即可实现开机自启动。上述代码也可直接在PowerShell 中执行。
未来已来,将至已至,以梦为马,不负韶华。驰网IDC致力于为广大开发者、政企用户提供全方位计算解决方案。帮助用户选择合适的产品满足其应用需求,为用户快速构建稳定、安全的计算环境。